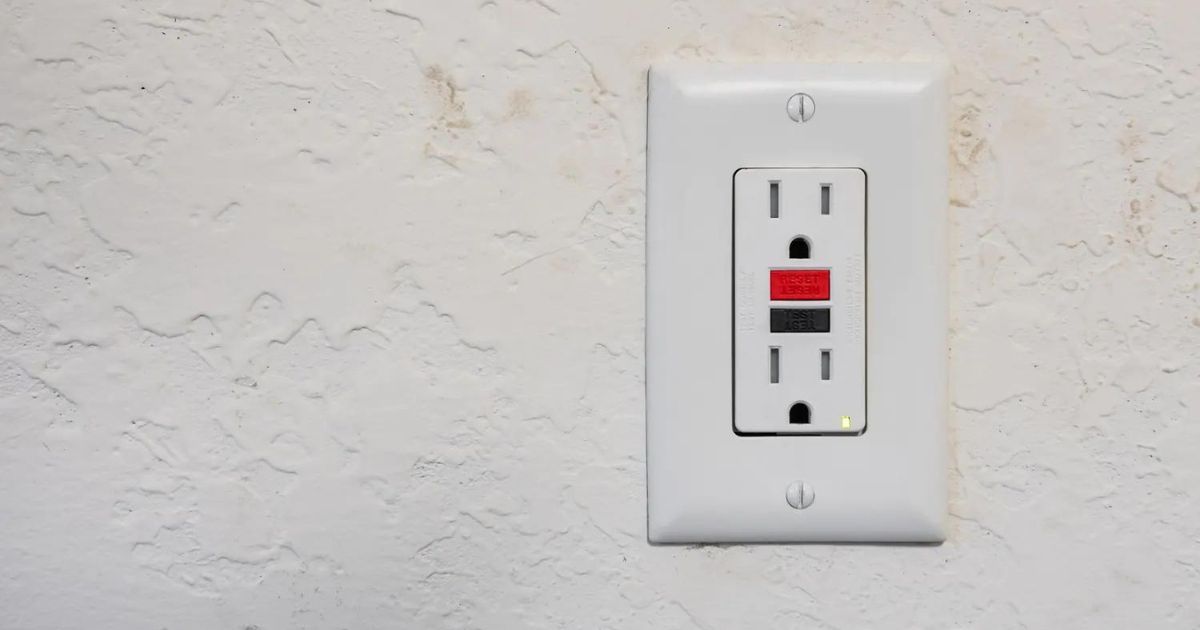
wp-content/uploads/2023/07/Outlets.jpg
July 5, 2023

Identifying Signs of a Faulty Electrical Outlet

Stay Safe & Secure With These Faulty Electrical Outlet Warning Signs!

Electrical outlets are an integral part of our daily lives, powering our devices and appliances. However, it’s essential to be aware of the signs that indicate a faulty electrical outlet. Recognizing these signs early can prevent potential hazards, such as electrical shocks, fires, or damage to your electrical equipment. In this article, we will discuss the key indicators of a bad electrical outlet, empowering you to take prompt action and ensure the safety of your home.

Frequent Power Surges

If you experience frequent power surges when plugging in or unplugging devices, it may indicate a faulty outlet. Power surges can damage your sensitive electronics and appliances. If this occurs consistently with a specific outlet, it’s crucial to have it inspected by a qualified electrician to identify and rectify the underlying issue.

Loose Outlets or Poor Connections

Outlets should have a snug fit when you plug a device into them. If you notice that plugs don’t fit securely or feel loose when inserted into an outlet, it may be a sign of worn-out or damaged internal components. Loose connections can lead to overheating, arcing, and potential electrical hazards. Contact a professional electrician to examine and repair the outlet to ensure proper functionality.

Warm or Hot Outlets

An outlet that feels warm or hot to the touch is a clear indication of an electrical problem. Heat buildup can be caused by loose connections, overloaded circuits, or damaged wiring. Overheating outlets pose a significant fire risk and should be addressed immediately. Turn off the power to the affected outlet at the breaker box and consult a licensed electrician to assess and resolve the issue.

Discoloration or Scorch Marks

Discoloration or scorch marks on the outlet itself or the surrounding wall are red flags of an electrical problem. These marks can occur due to arcing, overheating, or electrical sparks. They are indicative of damaged wiring or connections, posing a severe fire hazard. If you notice any discoloration or scorch marks, stop using the outlet and seek professional assistance to address the issue promptly.

Sparking or Crackling Sounds

If you hear crackling, buzzing, or sparking sounds when using an electrical outlet, it’s a clear sign of a potential problem. These sounds can indicate loose connections, damaged wiring, or electrical arcing. Never ignore or downplay such sounds, as they could lead to electrical shocks or fires. Turn off the power to the affected outlet and consult an electrician to investigate and resolve the issue immediately.

Tripping Circuit Breakers or Blown Fuses

Repeatedly tripping circuit breakers or blown fuses associated with a particular outlet suggest an electrical overload or short circuit. It’s essential to address this issue promptly, as overloaded circuits can result in electrical fires. Consult a professional electrician to assess the circuit, identify the cause of the overload, and make any necessary repairs or upgrades.

Non-Functioning Outlets

If an outlet stops working, it may indicate a wiring problem or a faulty outlet. First, check the circuit breaker or fuse box to ensure the circuit hasn’t tripped. If the circuit is active, but the outlet remains non-functional, it’s best to contact an electrician to investigate and resolve the issue.

You Can Count on Redline To Keep Your Home Safe!

Recognizing the signs of a bad electrical outlet is crucial for maintaining a safe and functional home environment. Power surges, loose connections, warm outlets, discoloration, sparking sounds, tripping circuit breakers, blown fuses, and non-functioning outlets are clear indicators of potential electrical hazards. If you encounter any of these signs, it’s essential to take immediate action by contacting a professional electrician.

wp-content/uploads/2023/07/CF.jpg
July 5, 2023

How To Install A Ceiling Fan & When To Call A Pro

A ceiling fan can be a great addition to any room, providing comfort and energy efficiency. Installing a ceiling fan yourself can save you money and give you a sense of accomplishment. However, it’s essential to know your limits and recognize when it’s best to call a professional. In this article, we will guide you through the steps of installing a ceiling fan yourself, while also highlighting situations where it’s advisable to seek professional assistance.

DIY Installation Steps

  1. Gather the necessary tools and materials: Before you begin, ensure you have the following items: a ceiling fan kit, a ladder, a circuit tester, wire cutters, wire connectors, electrical tape, a screwdriver, and pliers.
  2. Turn off the power: Safety is paramount. Before starting any electrical work, turn off the power to the circuit you’ll be working on at the breaker box. Confirm the power is off by using a circuit tester.
  3. Select the right location: Choose a suitable location on the ceiling that provides adequate clearance and complements the room’s layout. Ensure there is a junction box in place to support the weight of the fan.
  4. Install the ceiling fan mounting bracket: Attach the mounting bracket to the ceiling junction box using screws. Make sure the bracket is secure and aligned properly.
  5. Connect the wiring: Carefully thread the fan wires through the bracket and connect them to the corresponding wires in the ceiling. Typically, you will match the fan’s black wire to the ceiling’s black (hot) wire, the white wire to the ceiling’s white (neutral) wire, and the green or bare wire to the ceiling’s green or bare (ground) wire. Use wire connectors and electrical tape to secure the connections.
  6. Mount the fan motor: Attach the fan motor to the mounting bracket using the provided screws. Ensure it is securely fastened and properly aligned.
  7. Install the fan blades: Attach the fan blades to the motor using the provided screws. Ensure the blades are evenly spaced and tightened securely.
  8. Attach the fan light (if applicable): If your ceiling fan has a light kit, follow the manufacturer’s instructions to install it properly. Connect the wiring and secure any additional components.
  9. Secure all connections and components: Double-check all the wiring connections, ensuring they are tightly secured. Use electrical tape to wrap the wire connectors for added safety.
  10. Test the fan: Turn the power back on and test the fan’s operation. Ensure it rotates smoothly and the lights (if applicable) function correctly. Adjust any settings as needed.

When to Call a Professional For Ceiling Fan Installation in Tempe, AZ.

While installing a ceiling fan can be a relatively straightforward task for those with basic electrical knowledge and DIY experience, there are instances when it’s best to call a professional:

  1. Complex electrical work: If your home’s electrical system is outdated or if you’re unsure about handling complex wiring tasks, it’s wise to hire a licensed electrician. They have the expertise to ensure the installation meets safety standards and can handle any necessary electrical upgrades.
  2. High ceilings or difficult access: Installing a ceiling fan in rooms with high ceilings or challenging access points can be risky and challenging for DIYers. Professional installers have the necessary equipment and experience to handle these situations safely and efficiently.
  3. Structural concerns: If you’re unsure about the stability of your ceiling or the integrity of the mounting area, it’s best to consult a professional. They can assess the situation, make any necessary reinforcements, and ensure the fan is installed securely.
  4. Time constraints or lack of expertise: If you lack the time, tools, or confidence to complete the installation, hiring a professional ensures the job is done correctly and efficiently. They can save you time and provide peace of mind.

Call Redline For All Your Electrical Needs!

Installing a ceiling fan can be a rewarding DIY project, but it’s crucial to recognize your limitations and prioritize safety. By following the outlined steps and adhering to safety precautions, many homeowners can successfully install a ceiling fan themselves. However, for complex electrical work, difficult access points, structural concerns, or if you lack the necessary expertise, it’s advisable to seek the assistance of a professional electrician. Remember, the primary goal is to ensure a safe and functional installation that enhances the comfort and aesthetics of your space.

wp-content/uploads/2023/07/EV.jpg
July 5, 2023

What EV Charger Should I Get?

As the popularity of electric vehicles (EVs) continues to soar, more and more drivers are looking for convenient ways to charge their cars at home. Fortunately, there are various EV chargers available that can be installed in residential settings, providing EV owners with flexibility and ease of charging. In this article, we will explore the different types of EV chargers suitable for home installation and discuss their features, benefits, and considerations.

Level 1 Chargers

Level 1 chargers are the most basic type of EV chargers available for residential use. They typically come with the vehicle and can be plugged into a standard 120-volt electrical outlet. While they are the slowest option, offering charging rates of about 2-5 miles of range per hour, they are the most accessible and require no additional installation or equipment.

Level 1 chargers are ideal for those with limited charging needs, shorter commutes, or who have ample time to charge overnight. They are also cost-effective and do not require any specialized electrical work. However, they may not be suitable for those requiring faster charging or longer-range driving.

Level 2 Chargers

Level 2 chargers provide faster charging speeds compared to Level 1 chargers, making them a popular choice for residential installations. They require a dedicated 240-volt circuit, which often necessitates professional installation by a qualified electrician. Level 2 chargers can add around 10-60 miles of range per hour, depending on the vehicle and charger specifications.

One advantage of Level 2 chargers is their versatility. They are available in various configurations, including wall-mounted units or portable chargers with plugs compatible with different electrical outlets. Level 2 chargers also offer advanced features like smartphone connectivity, scheduling, and energy monitoring. Additionally, some utility companies offer time-of-use rates that can incentivize charging during off-peak hours, reducing electricity costs.

Smart Chargers

Smart chargers, or connected chargers, are a type of Level 2 charger equipped with advanced communication capabilities. These chargers can be integrated into a smart home system, allowing users to control and monitor their charging sessions remotely using smartphone apps or voice commands.

Smart chargers offer features such as real-time charging status updates, energy consumption monitoring, and the ability to schedule charging sessions based on time and electricity rates. They can even optimize charging based on renewable energy availability or other user-defined preferences. Smart chargers provide convenience, energy management, and a seamless user experience.

DC Fast Chargers

DC Fast Chargers, also known as Level 3 chargers, are the fastest charging solution available for residential use. These chargers deliver high-voltage direct current (DC) power directly to the vehicle’s battery, bypassing the onboard charger. DC Fast Chargers can provide 60-80 miles of range in just 20 minutes, making them suitable for drivers requiring quick top-ups during a long journey.

Due to their high charging rates, DC Fast Chargers require more significant electrical infrastructure and are not commonly installed in residential settings. However, some EV manufacturers are beginning to offer home-compatible DC Fast Chargers that require professional installation and potentially an upgraded electrical system.

Considerations for Home Charger Installation

Before installing an EV charger at home, there are several important factors to consider:

  1. Electrical Capacity: Determine if your home’s electrical system can support the charger’s requirements. Consult with a licensed electrician to assess the existing electrical capacity and whether any upgrades or modifications are needed.
  2. Charging Speed: Evaluate your daily driving needs and choose a charger that provides a suitable charging rate for your lifestyle. Consider factors such as range, commute distance, and the availability of public charging stations in your area.
  3. Installation Costs: Understand the installation costs associated with different charger types, including any electrical upgrades or permits required. Additionally, check for potential incentives or rebates offered by government entities, utility companies, or EV manufacturers to offset the installation expenses.

Call Redline For Assistance Choosing The Right Charger!

Installing an EV charger at home provides the convenience and peace of mind of having a dedicated charging solution for your electric vehicle. Whether you opt for a Level 1 charger, Level 2 charger, smart charger, or explore the possibilities of DC Fast Chargers, there is a solution that suits your needs. Consider your charging requirements, electrical capacity, and budget to make an informed decision. Embrace the future of transportation with home EV charging and enjoy the benefits of sustainable driving on your terms.

Request a quote

Career Form